Using Templates on Epos Now
Once you have defined your templates in Slynk and set their status to Published, they are ready to use in the app.
You can use the Order Templates app in three places:
- Epos Now back office
- The till
- The Slynk dashboard
The Slynk dashboard uses the same app flow as back office mode.
Back Office
To use the app in the Epos Now back office:
- Login to the Epos Now Back Office
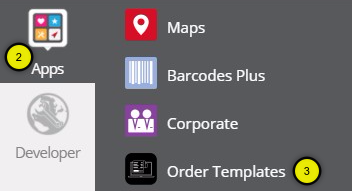
- Select Apps from the left hand side menu
- Select Order Templates from the list
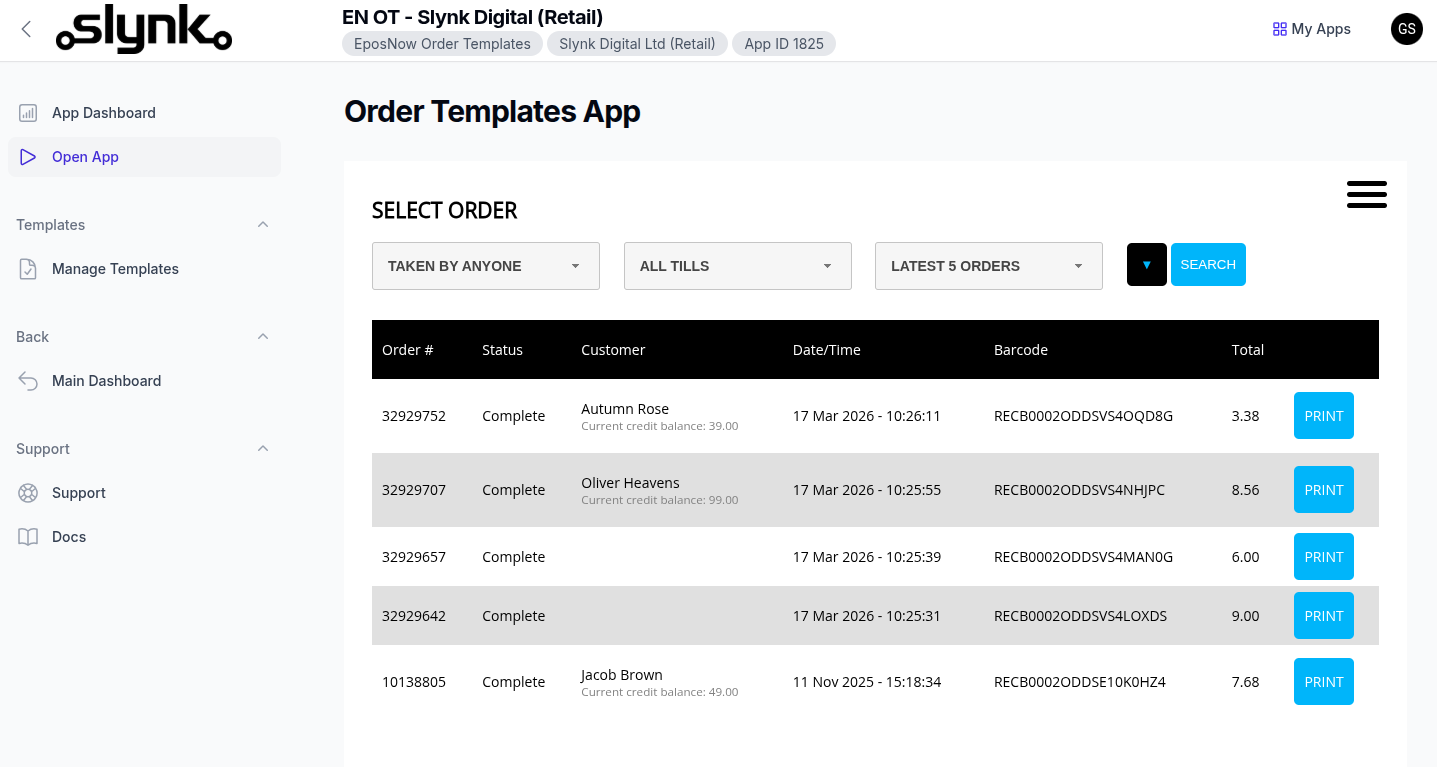
In back office mode, the app always shows the transaction list first. When you click Print, you then choose which published template to print.
Dashboard
You can also open the Order Templates app from the Slynk dashboard.
- Log in to the Slynk dashboard
- Open the Order Templates app
- Select Open App
- Search or select the transaction you want
- Click
Print - Select the published template you want to print
When the app is opened this way, it runs in back office mode. That means it always shows the transaction list first, then prompts you to choose the template to print.
Till
To use the app on the till:
- Click on the menu button at the top left of the till
- Select Settings
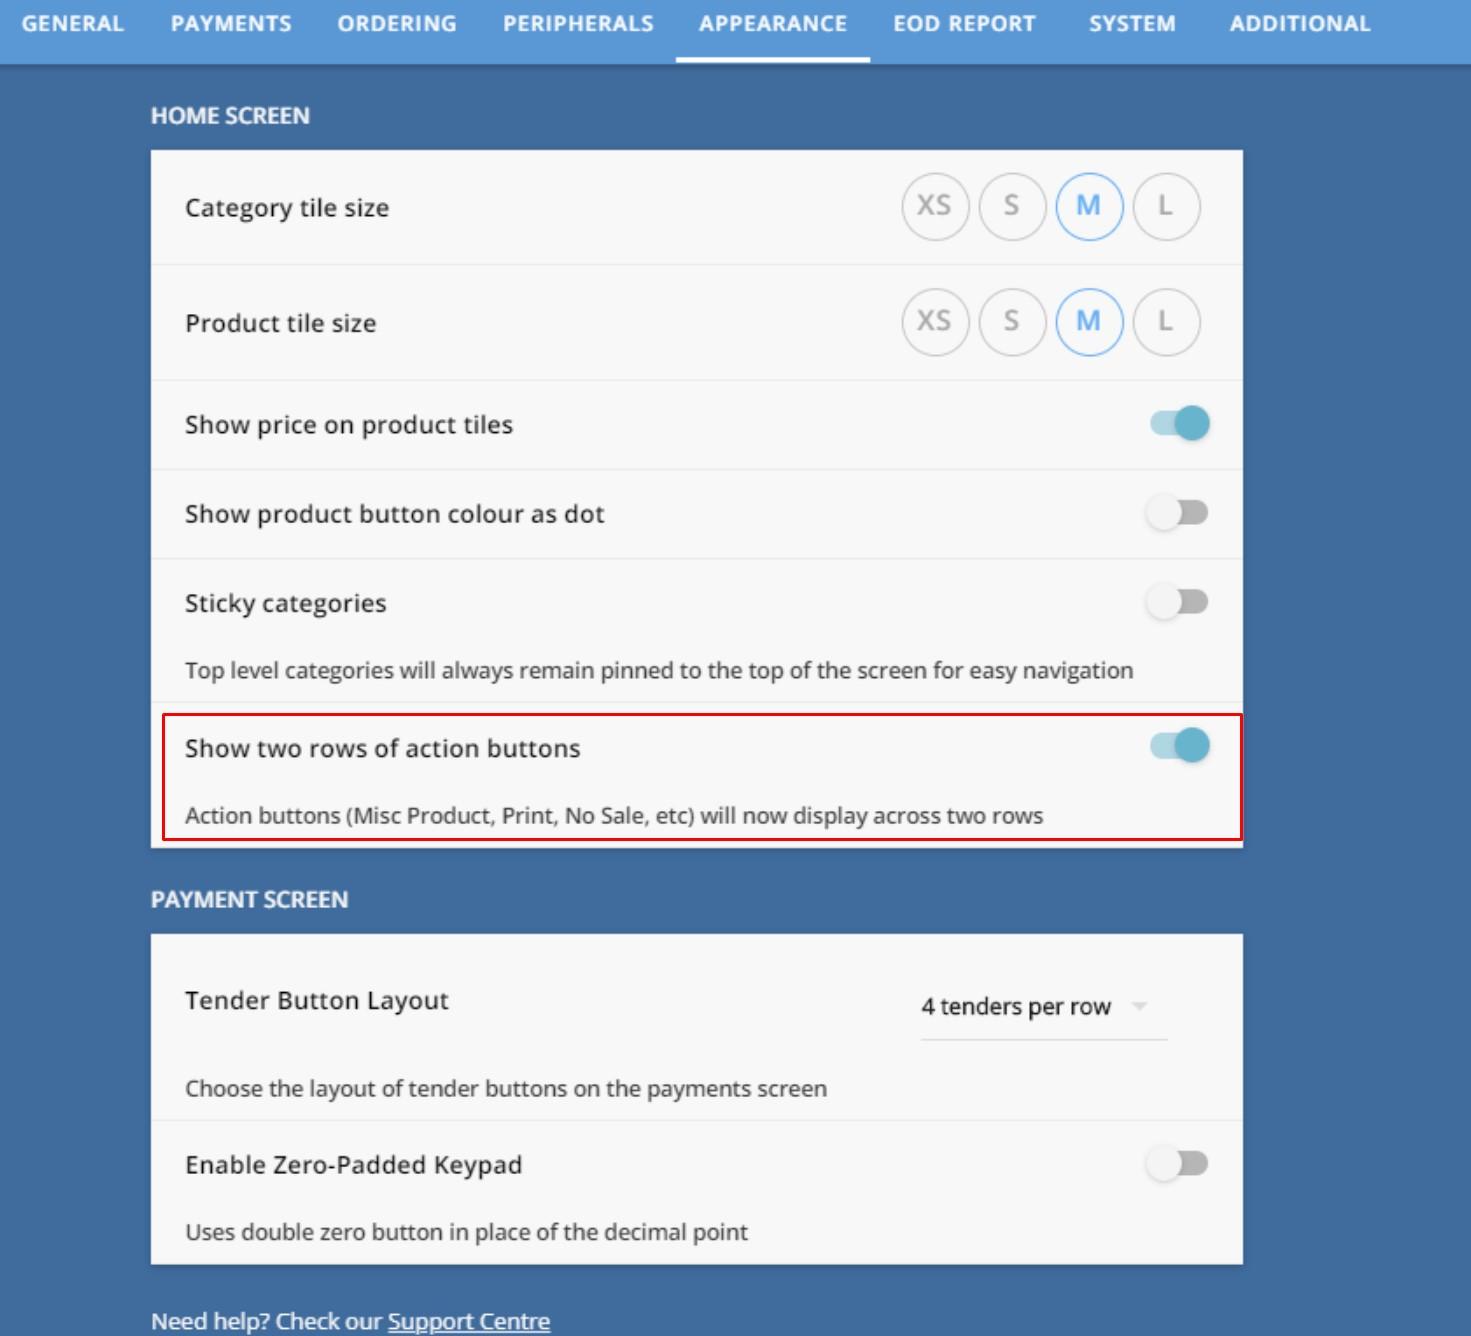
- In the Till tab, switch on the Show two rows of action buttons setting
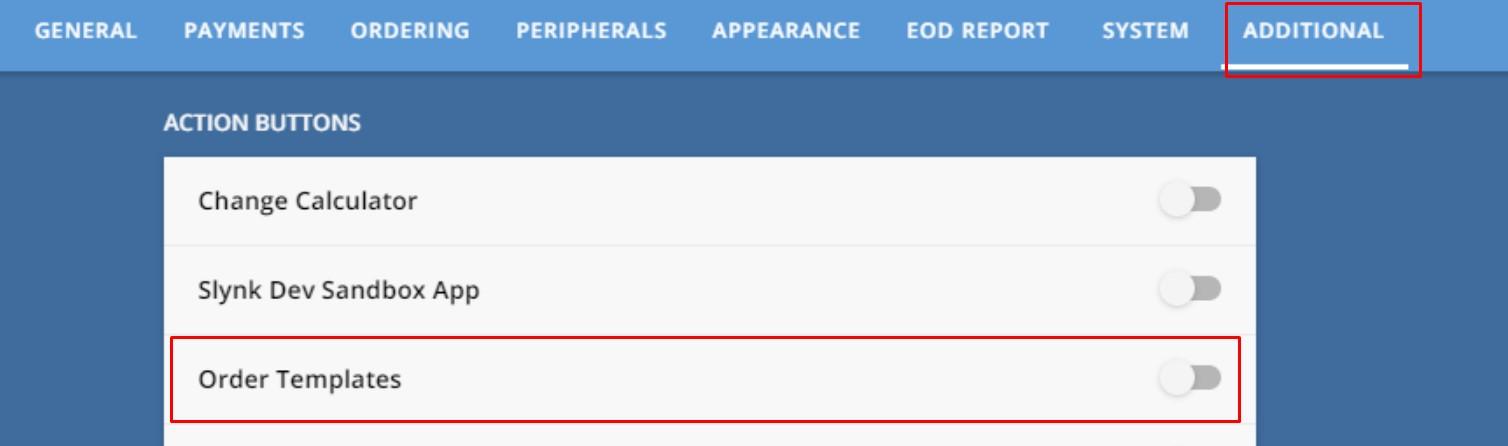
- In the Additional tab, on the Action Buttons section, switch on the Order Templates setting
On the till, the action taken after you open Order Templates depends on the Default Action Button Setting in Manage Templates.
Those options are:
Show order listSelect template with last orderPrint last order with default template
If you want to control this behaviour, update it in Manage Templates.
Order Selection
In the order selection screen, the last 5 orders are shown by default. You can then select which order you want to print.
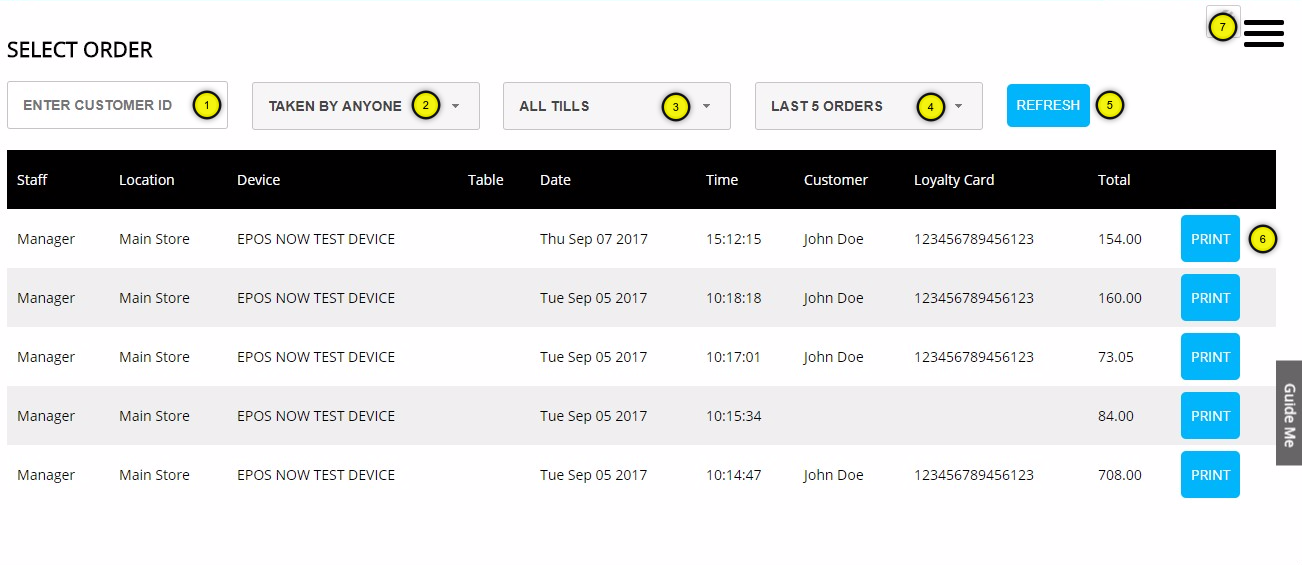
1. Customer Filter
The orders can be filtered for specific customer IDs, only in the back office. To obtain a customer ID, go to Epos Now, then Management > Customers, and click on details for the selected customer.
You can then obtain the customer ID from the URL in the browser.
Example: https://www.eposnowhq.com/Pages/BackOffice/CustomerDetails.aspx?CustomerID=1398681
2. Sales Person Filter
Select whether to filter the orders by the user currently logged in.
3. Device Filter
Select whether to filter the orders taken on the till being used.
4. Number of Results
Select the number of results to return. The larger this number, the longer it takes to retrieve all the data.
5. Refresh List
Click to load the orders that match the filter criteria above.
6. Select & Print
Select the order and go to the template selection screen.
7. Menu Button
This is the menu button to navigate through the app.
Template Selection
Once an order has been selected, you can then select the template to print.

1. Select Template
Click the template that you want to print. Once clicked, the template is printed.