Manage Templates
After installation, manage your templates from the Slynk dashboard.
Log in to your Slynk dashboard and open the Order Templates app.
Select Manage Templates from the menu on the left hand side of the screen.
This is where you create templates, review existing templates, choose a default template, and control the default action for the till action button.
Manage Templates
The image below shows the main Manage Templates screen.
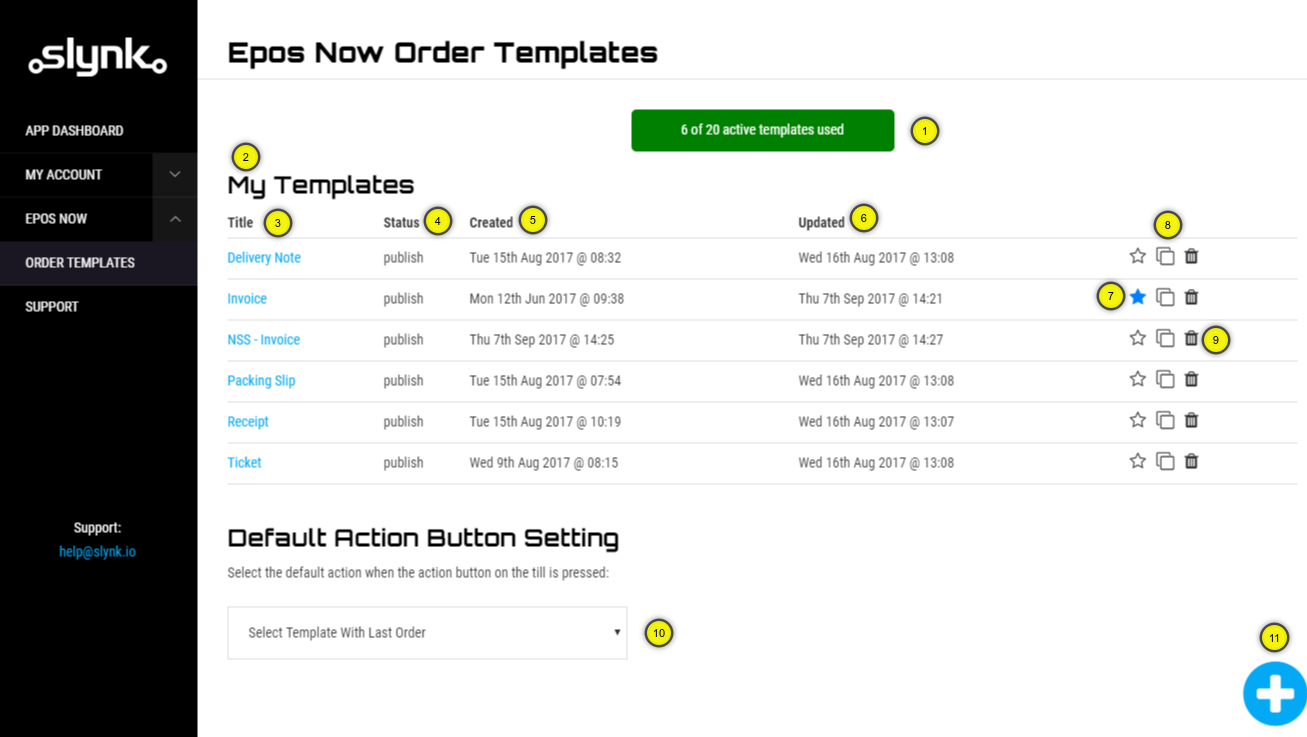
1. Active Templates Count
Shows how many active templates you are using in your subscription.
You can have as many templates as you like in your account, but only a certain number of active or published templates can be used in Epos Now depending on your subscription plan.
2. My Templates
Shows a list of all the templates in your account.
3. Template Title
The name of your template. This is the name that the template is referred to as in Epos Now, so choose the name carefully so that it is easily identified. Clicking on the title will open this template for editing.
4. Template Status
This shows whether the template is in draft or published status.
5. Template Creation Date
This shows the date and time when the template was created.
6. Template Updated Date
This shows the date and time when the template was last updated.
7. Default Template
This shows whether the template is the default template. You can only have one default template. Click on the star icon to set a template as the default.
8. Duplicate Template
You can create a duplicate of an existing template by clicking this icon.
9. Delete Template
Click on this icon to delete the template. Please be careful with this function as deleted templates cannot be recovered.
10. Default Action Button Setting
When the Order Templates action button is pressed on the till, this setting defines what happens. This setting affects till behaviour only. In back office mode, including when you use the app from the Slynk dashboard, the app always shows the transaction list first and then lets you choose a template to print.
There are three options:
a. Show order list
This shows a list of recent orders on the till so you can choose the order first and then select the template to print.
b. Select template with last order
This automatically selects the last order on this till and then lets you choose one of the active templates to print. This is useful when you have multiple active templates.
c. Print last order with default template
This automatically selects the last order on this till and prints your default template.
If you want the till action button to print immediately without asking which template to use, set a default template and choose Print last order with default template.
Add a Template
1. Add New Template
Click on the blue plus button at the bottom right of the main screen. This opens the add template screen.
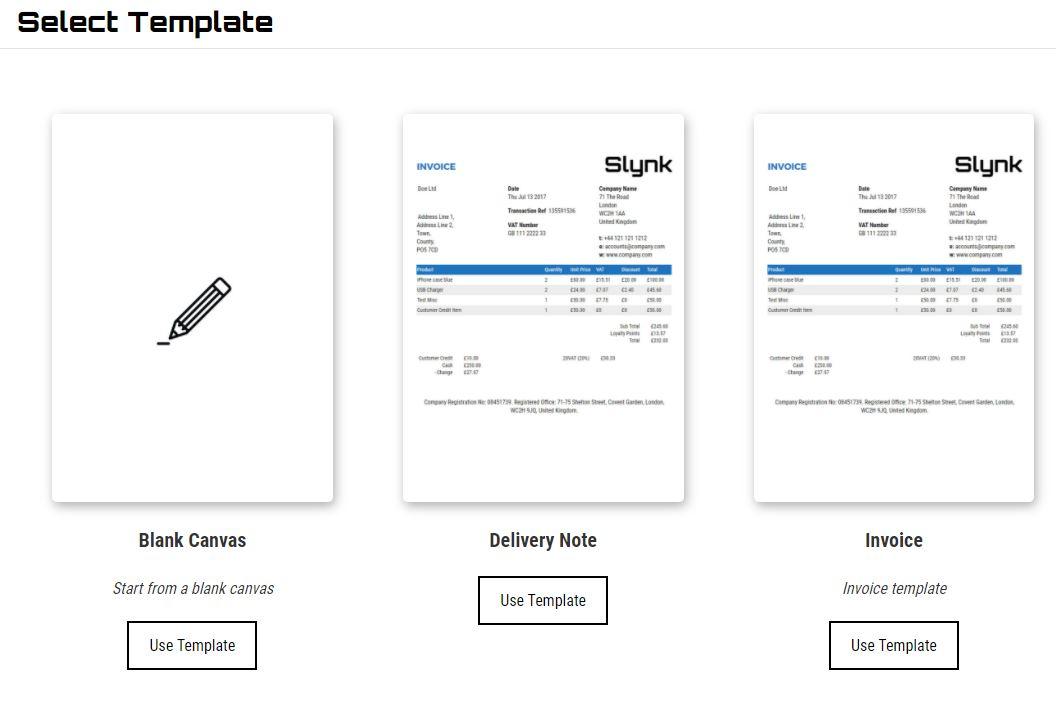
2. Select Starting Point
You can choose to start with a completely blank canvas, or choose one of the ready-made templates to use as a starting point. Click on the image to view a preview of the template, or click on Use Template to create your template.
3. Edit Template
Once the template is created, you can start customising it in the editor.
Publishing Templates
Templates must be set to Published before they are available in the app.
Draft templates stay in your account but cannot be used from back office, the till, or from the Slynk dashboard.
Next Step
After you create your template, continue with the Template Editor section.